In woodworking, the ability to draw a perfect circle or arc is a handy skill. They may be drawn with simple and low-tech methods to more complex specialized tools. You might get by with finding paint tins or jar lids for a time, but what about something bigger?
No matter your level of experience or expertise, there is a method here that will suit your needs. So let’s get started!
What are circles and arcs?
A perfect circle shape is when all points on the circumference are equidistant from the centre. The radius is the measure of how far out from the centre a given point on the circumference is. But the entire circle can also be defined by its diameter, the distance between two points on the circumference passing through the centre.
An arc is a segment of a circle’s circumference, defined by two endpoints and the bit between them. The length of an arc depends on the central angle that it subtends, as well as the base circle radius.
For example, a perfect circle must be drawn when designing a round table top or a wooden wheel. But sometimes, you only need part of a circle. In these cases, knowing the radius of the partial circle is necessary.
What are the different types of circles and arcs you can make in woodworking?

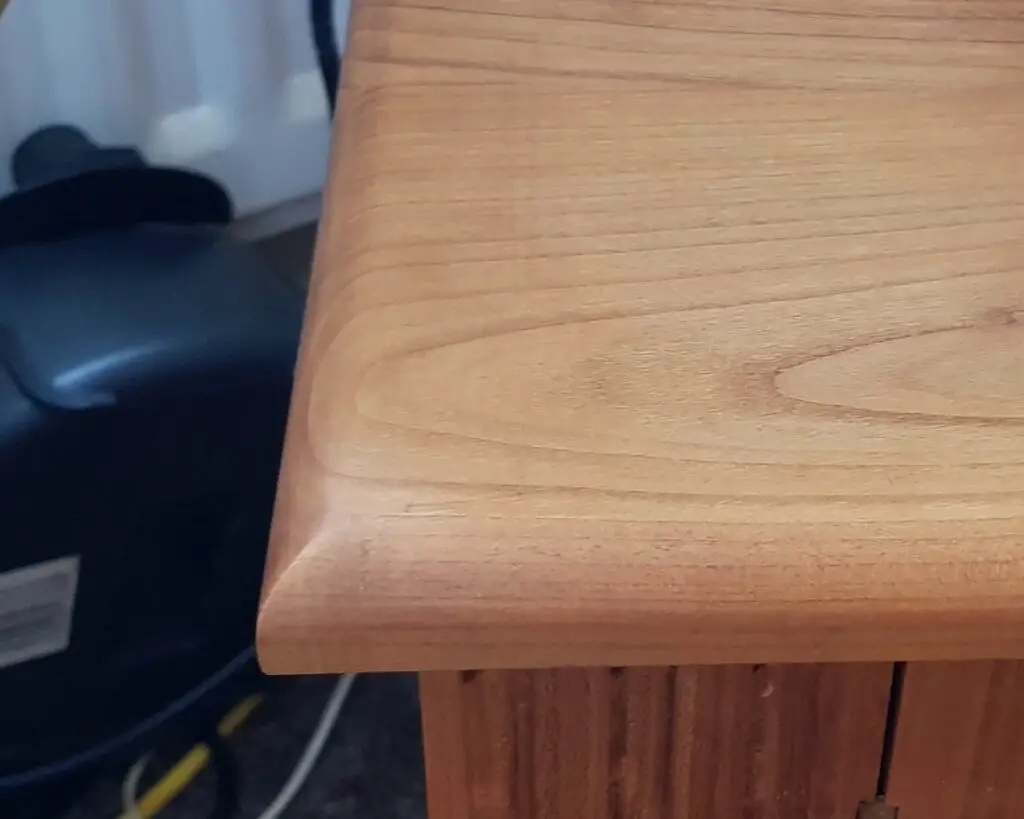
1. Round Corner
A round corner is a type of curve that’s employed to decorate a piece of woodwork. It involves creating a rounded edge along the surface of a piece of wood. This can be done in various ways, such as with an electric router, a saw, a chisel or a plane. Round corners soften the overall look of a piece, producing a smooth edge for a project’s finish.
2. Full Circle
A full circle is popular because it allows you to create an elegant and stylish piece of furniture. Wheels, table tops, and other spherical things are all made from complete circles.
3. Half Circle
A half circle is a simple shape where only one side of the circle is drawn rather than a full circle. This type of shape is often employed for applications such as arches. The diameter of a half circle is half of the whole circle, so it is 1x the radius curve.
One everyday use of a half circle is for woodworkers building rocking chairs or cabinets with rounded tops. Curved shapes can be cut out with a jigsaw or as a template to trace the outline. Circle templates are useful for drawing on wood or a round edge of a corner.
4. Arc
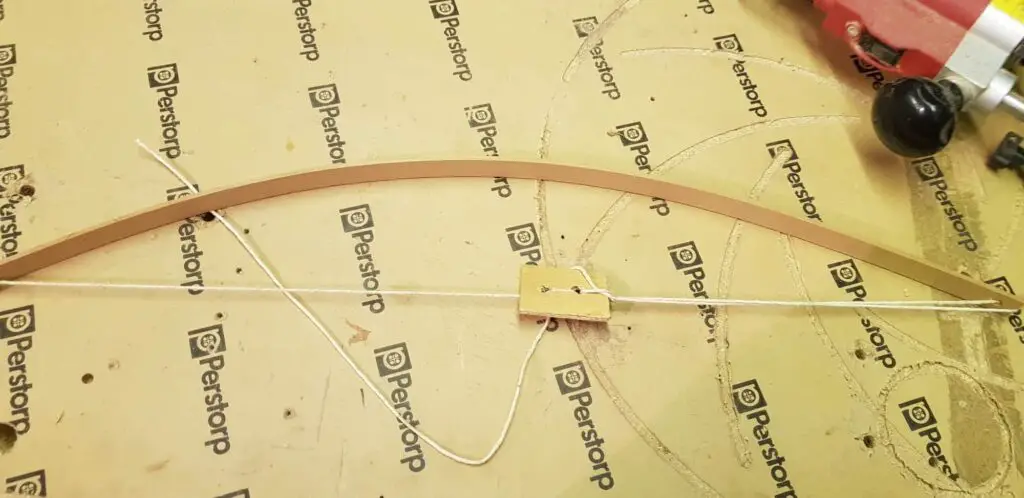
Arcs are curved lines made up of two points, often used to define the outer edge of a face. It is created by pinching a wood strip that is 1⁄8 x 3⁄4 x 15″ to produce a smooth curve.
5. Crescent
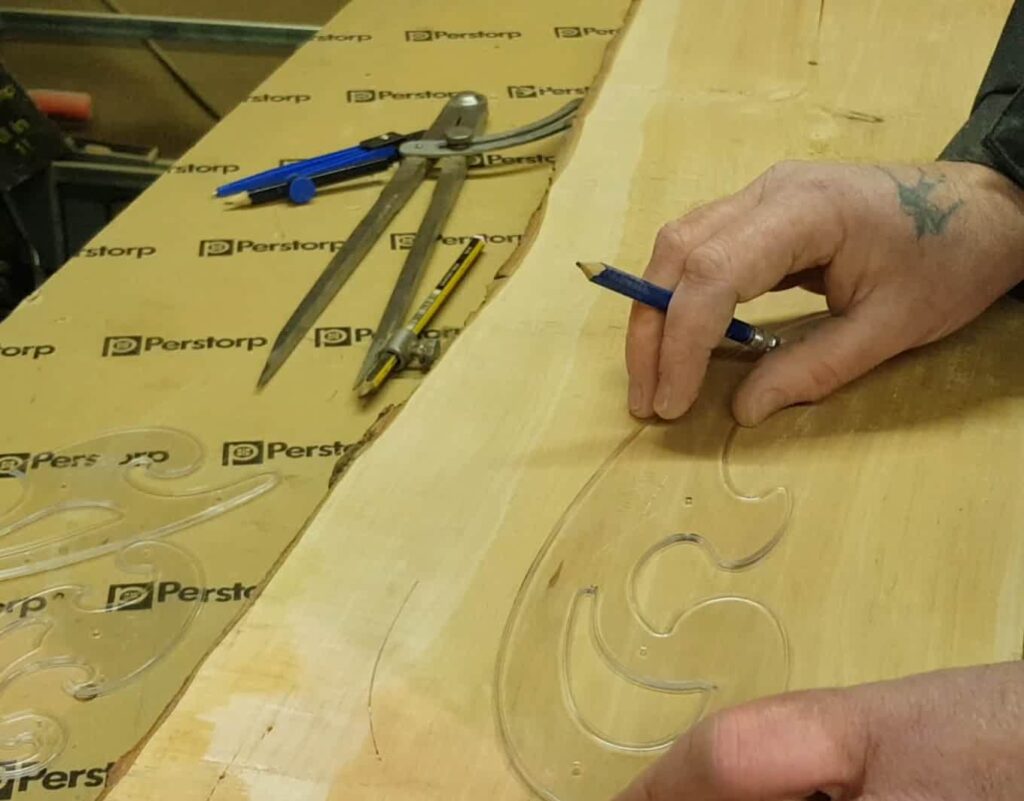
A crescent is a type of arc that artisans widely use. Its curvature characterizes it. It is commonly used to make wooden pieces, such as rocking chairs and curved headboards. A combination of French curves or pair of compasses achieves the graceful curves of crescents.
French curves require choosing the best area for the most pleasing curve and drawing the line between two points. Sometimes, combining short sections from different parts may be necessary for a single graceful line. A crescent is a great way to customize pieces and give them a unique and elegant look.
6. Ellipses
Making an ellipse in woodworking can be tricky, but it is not impossible. Here is the step by step instructions to complete one:
- Start by determining the desired size of the ellipse you want to create. To calculate the radii, measure its major axis and width with a ruler or measuring tape.
- Draw precise straight lines with a ruler through the centre to divide it into four quadrants. This will help you evenly divide the ellipse.
- Use a compass for drawing two arcs in the two top quadrants. Start from the middle and draw one arc to the left and one to the right.
- Connect the two arcs to form a semicircle.
- Repeat the process in the bottom two quadrants to construct another semicircle.
- Connect the two semicircles with diagonal lines between the ends of the arcs in the top and bottom quadrants.
- Use a pad saw if you need to cut out the hole. Use a sanding block or orbital sander to smooth out any rough edges.
And there you have it – a beautiful design for your next woodwork project!
7. Angled Curves
Woodworking projects with angled curves seem light and strong. You can draw curves with a professional compass, trammel points, or a homemade drawing batten.
For example, the upwardly arching arc on a crest rail is angled to lighten a piece. This adds aesthetic appeal and makes high-end furnishings seem more costly.
What tools are used to draw circles and arcs in woodworking?
It’s important to note that drawing circles and arcs is a fundamental skill for carpentry. While several methods work, the compass is the most popular. Craftsmen have handcrafted many tools for centuries. Explore several approaches to add depth and complexity to finished materials.
1. Choose the best tool for the job
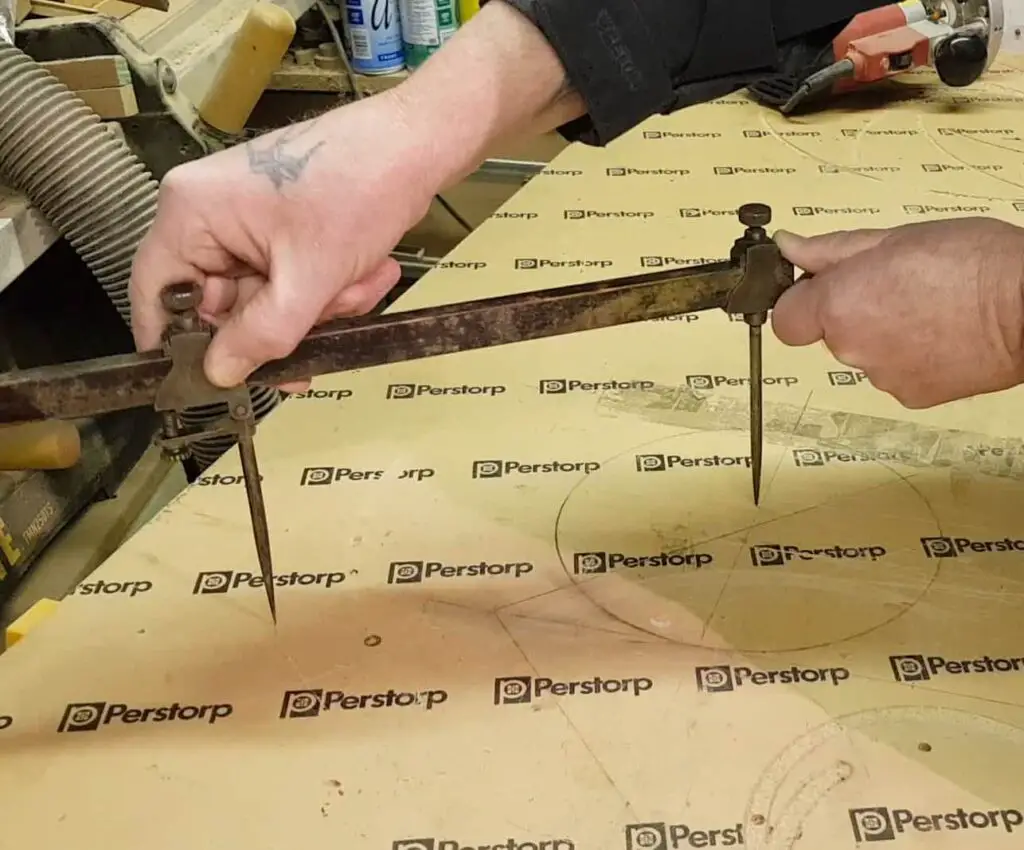
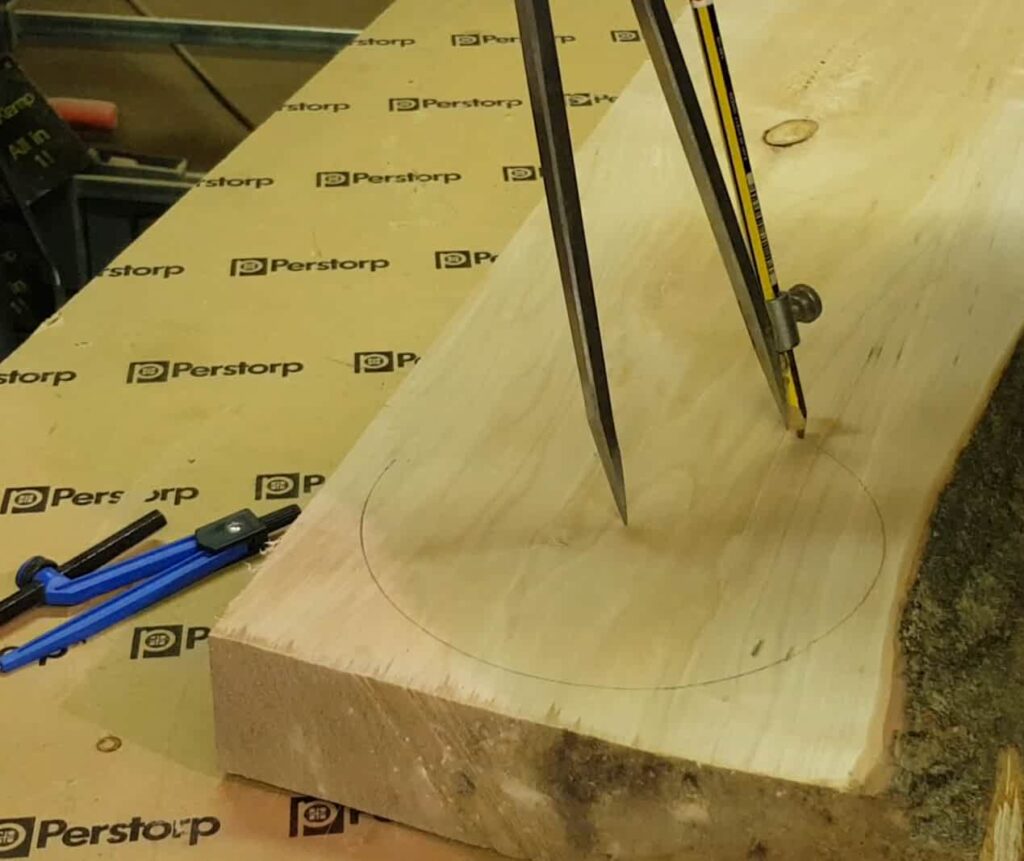
Drawing them can be done using a French curve or a trammel for larger circles. A trammel bar is a marking device that pivots around a centerpoint to create a circle. A thin batten with a spike in one end is marked from the adjustable point at the other to match the circle’s radius. With both items, you have to adjust the scribe tool or position of the workpiece to ensure an accurate cut.
2. How do you make a perfect circle in woodworking?
Using a woodworking compass to draw a circle is a simple and effective way to create the basic shape. To do this, all you need is a quality compass. That one from the school basic geometry set will only do for up to 6 inches. You can make simple forms with a pencil and piece of string.
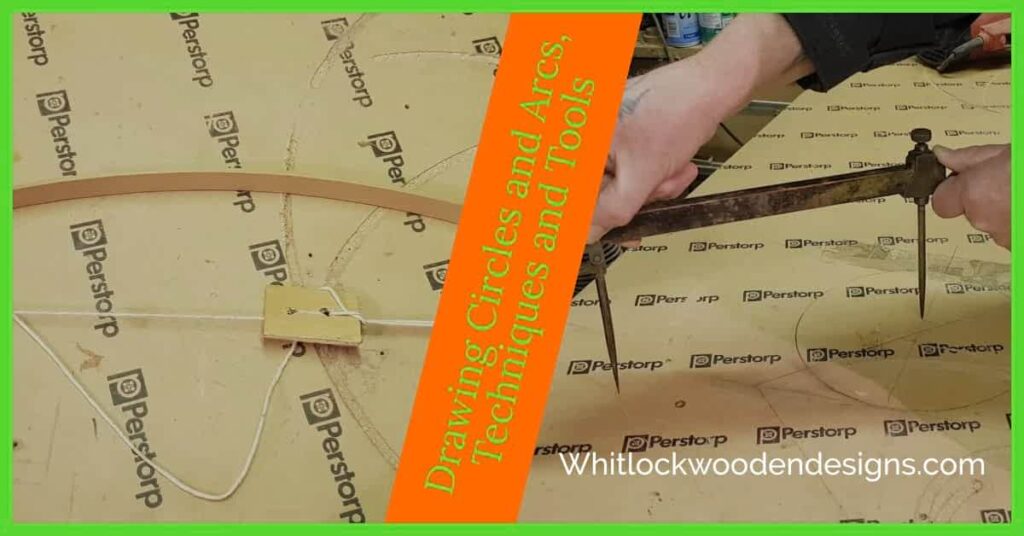
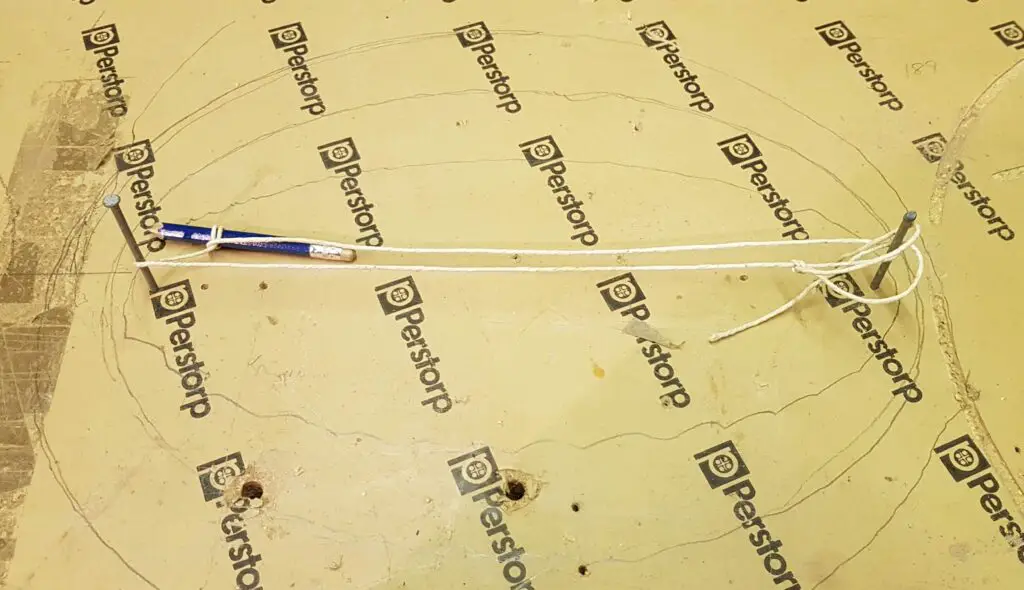
Using a String Compass:
- Drive a nail or spike into the center of the circle.
- Tie one end of a string to a pencil and the other to the central nail.
- Hold the pencil firmly and slowly draw around the center.
Using dividers or beam compass, the point is placed in the middle of the workpiece, and the pencil inserted into a 3/8″ guide hole of the beam. This allows for a single revolution around the pin with the pencil, resulting in an accurate circle. Trammels are easy to use, accurate, and can be used to draw arcs and circles. They can be made from an offcut of 1×2 if you want to avoid purchasing one. With the right circle drawing tool, things can be done quickly and efficiently.
How do you draw a curve or arc?
Drawing irregular curves or arcs can be done in several ways. Use pins or a 1/8x 3/4 x 15″ lath to mark the curve’s beginning and finishing points. The strip will have an equal curvature with the bending pressure applied at the endpoints of the arc. It might not be a perfectly circular outline, but you can adjust it if necessary. If you want the best results, carefully select the stick/lath for straight grain and no knots. You can also try bending a drywall T-Square, taking into account the length and height of the arc needed.
Printing the contour on tiled printer paper is another option. Produce a stencil by tracing the design onto cardboard or another thin, stiff material.
You can also use a string or a rigid board and pin one end to the center of the circle. Then tie a marker to the other end, keep the string taut (pulled tight), and revolve around the pin to draw the arc. Wood routers are great devices for complex shapes and circles.

Online drawing tool websites
SketchUp’s website offers a variety of adjustable circle drawing tool’s. The Arc and Pie aids draw open and closed arcs, and the Protractor and Circle tools help you draw circles. You can set the angle and number of segments with the Arc and Pie options. While the Protractor enables you to generate an exact or approximate version, respectively.
Blender’s web site is a free 3D modelling software that is similar to the above. It allows users to construct a wide range of objects using various features.
Practice makes perfect; try with the string and nails to achieve your desired form. With some patience, you’ll be drawing beautiful circles in no time!
What is the radius of an arc or circle?
The radius of an arc or circle is half the distance from the centre point to the circumference. This is an essential measurement when scribing arcs, as it determines the size of the curve. Measure the length of a round item like a dowel, halve it, and then mark the radius on the surface. Knowing the circumference is essential for woodworking projects.
Rounding things off
Using the skills mentioned above, you can now draw a large circle or ovals in a snap. These techniques will be helpful no matter what kind of project you are working on. Whether a modern round coffee table or a DIY sleigh bed, these tips and tricks can help you with the final piece.
And so, with these woodworking techniques, you can now develop intricate and beautiful shapes. So remember to subscribe to the newsletter to be the first to know when new projects and tips come out. Happy building!
"I like to make things. I'm not a super handyman or anything, but I've always been interested in woodworking and other DIY projects. I find that if I have something in my hands, I can solve difficult problems better than if I am staring at a computer screen or reading about them on the internet." There is only so much furniture and art you can fit in a house, and giving to family and friends only lasts so long, so here we are with a crafts shop.
I enjoy writing about my projects and other topics related to crafting, like making something with your hands.
